Jan Elvis
09.10.2025

Jan Elvis
09.10.2025
Before you even think about starting, getting your gear in order is the first, most crucial step. How you groom your chest hair and the final result really comes down to the tools you have on hand.
A good electric body groomer with a set of guards is your most valuable player. It gives you the flexibility to trim to different lengths without chewing up your skin. If you're going for that completely smooth look, a fresh manual razor and some quality shaving cream are non-negotiable.
Let’s be honest, jumping into this without the right equipment is a recipe for disaster. We're talking nicks, razor burn, and a patchy job that just looks off. Choosing the right tools isn't just about the result; it's about comfort and keeping your skin happy.
Think of it this way: you're building a small arsenal for a specific mission. You need precision, control, and safety, especially when you're working around tricky spots.
Your workhorse is going to be an electric trimmer. Sure, you could try using your beard trimmer, but a dedicated body groomer is built for this. They typically have rounded blade tips and heads that pivot to follow the curves of your chest and collarbones, which dramatically cuts down on the risk of nicks.
The real magic, though, is in the adjustable guards. These little plastic attachments are everything. They let you dial in the exact length, whether you just want to knock back some of the bulk or go for a much shorter, more defined style. That level of customization is what makes the difference between a deliberate, clean look and just hacking away at it. For a deeper dive into building a solid routine, check out these essential grooming tips for men.
A trimmer does most of the heavy lifting, but if your goal is skin-smooth, you'll need to bring in a manual razor. Go for a multi-blade model with a moisture strip and never, ever skip the shaving gel or cream. It’s your skin's first line of defense.
To make the choice clearer, here’s a quick breakdown of your main options.
| Tool | Best For | Pros | Cons |
|---|---|---|---|
| Electric Body Groomer | Trimming to a consistent length, general tidying | Highly versatile with guards, low risk of cuts, fast | Doesn't provide a completely smooth finish |
| Manual Razor | A completely smooth, hair-free chest | The closest possible shave, clean finish | High risk of nicks, razor burn, and ingrown hairs |
| Grooming Scissors | Light touch-ups and trimming stray hairs | Good for precision on a few long hairs | Not practical for large areas, easy to create unevenness |
| Waxing/Sugaring | Long-lasting smoothness (4-6 weeks) | Results last for weeks, hair grows back finer | Can be painful, risk of skin irritation and ingrowns |
As you can see, each tool has its place. For most guys, starting with a quality body groomer is the smartest move.
This infographic lays out the key differences visually.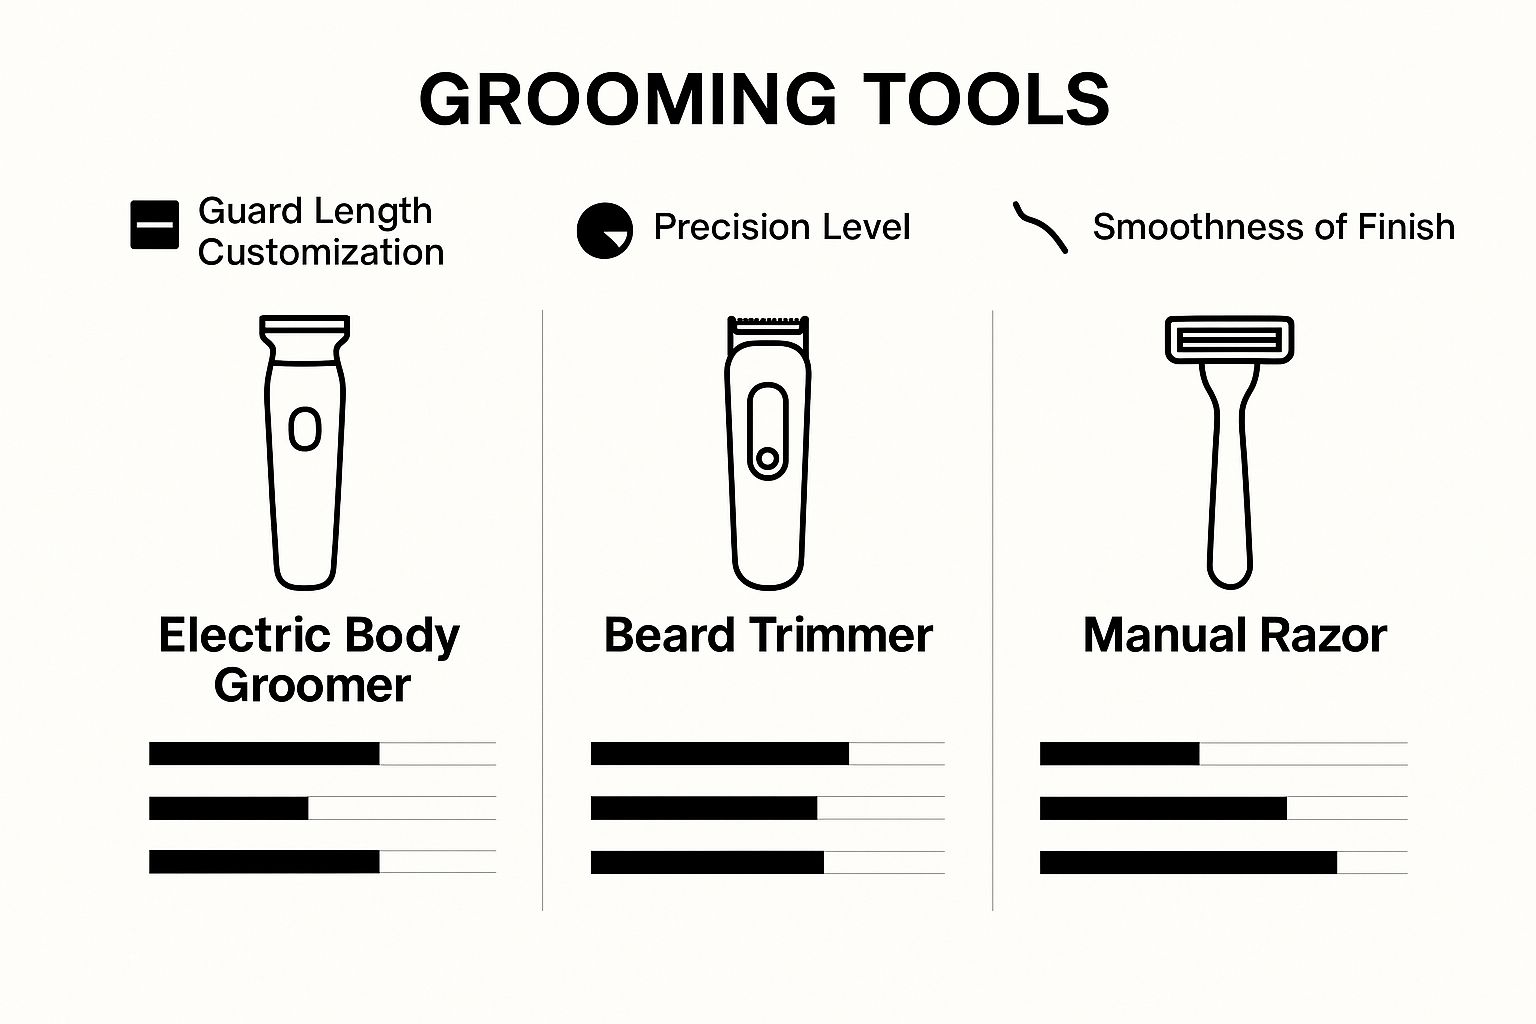
It's pretty clear: razors get you the smoothest finish, but for a balance of safety and customizable length, body groomers are the undisputed champ.
The popularity of these tools isn't just anecdotal. The men's grooming market is huge, valued at around USD 90.56 billion, and it's driven by guys wanting better gear. In fact, sales of body groomers have seen an incredible 74% sales growth in the last two years alone as more men look for pro-level results at home.
Jumping straight into trimming a dry chest is probably the biggest mistake guys make. It's the number one reason for skin irritation, razor burn, and those awful, painful ingrown hairs. Prepping your skin isn't just an extra step; it's the foundation for getting a smooth, comfortable groom without the aftermath.
Think about it like this: you wouldn't paint a wall without cleaning and priming it first, right? Same deal here. Spending just 10 minutes to get your skin and hair ready will make your trimmer glide like a dream and seriously cut down on nicks and redness. This little bit of prep work makes a huge difference.
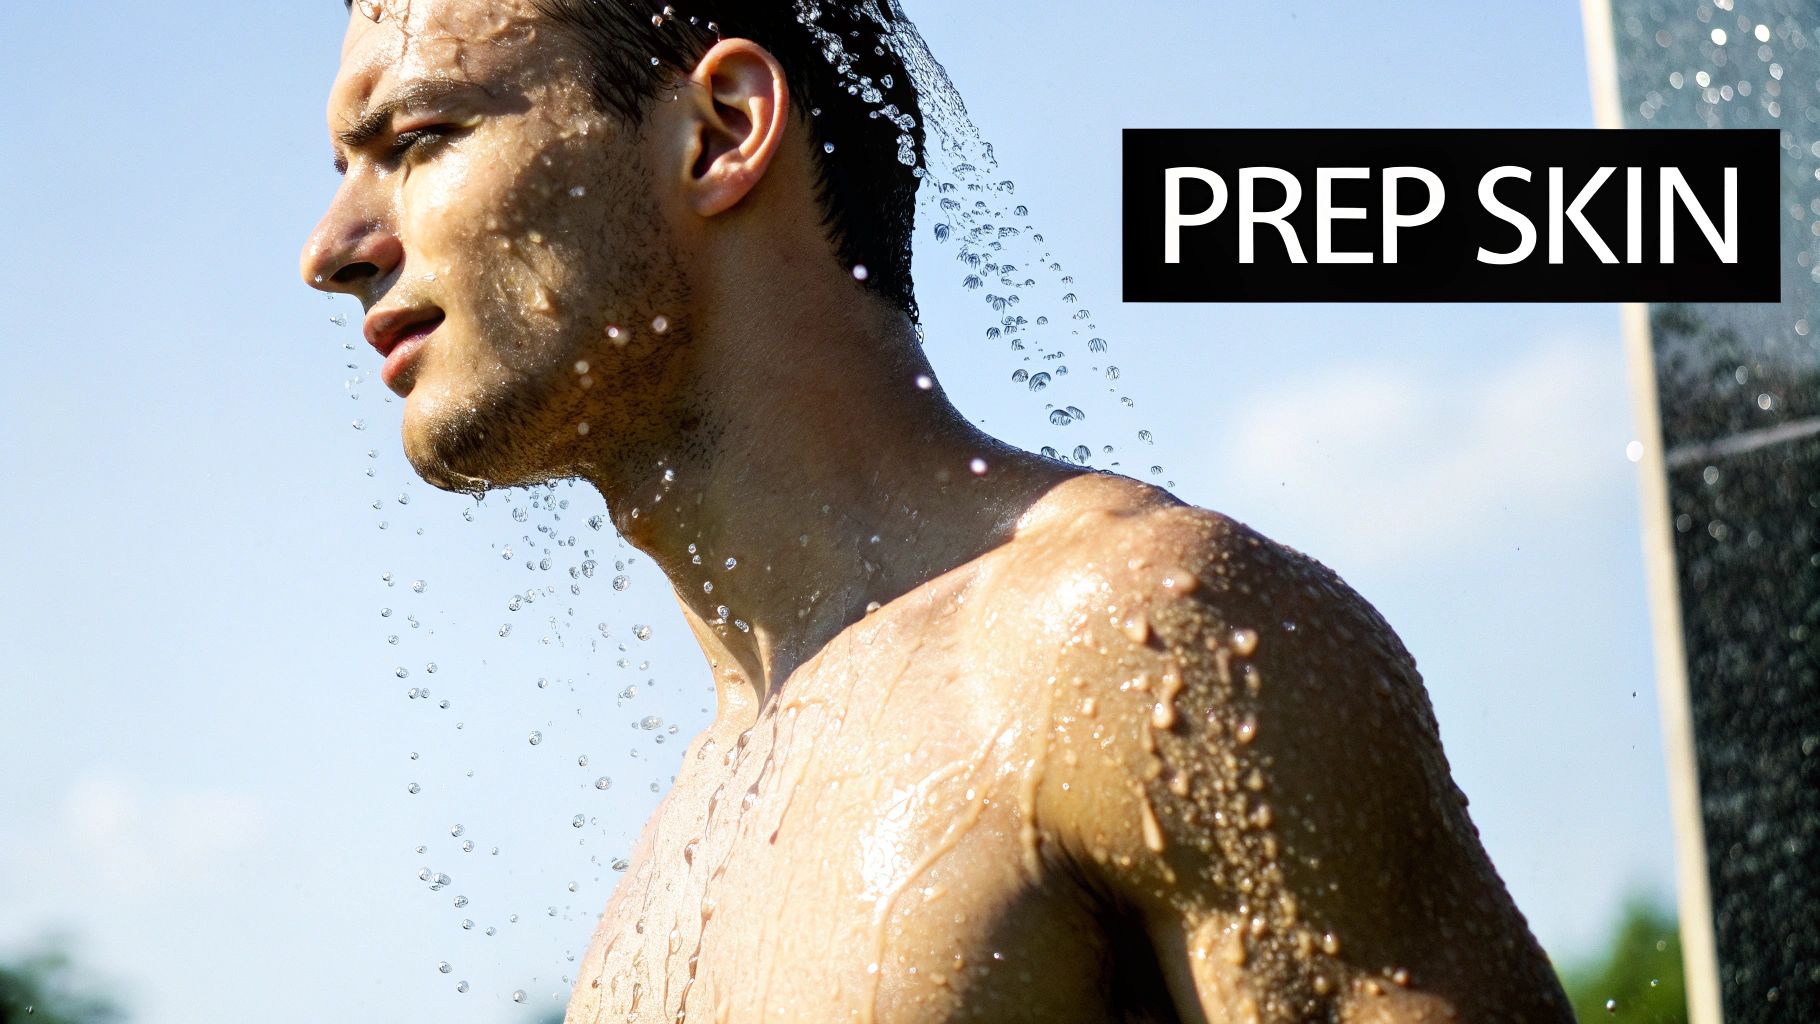
Honestly, the best thing you can do before grooming your chest is to hop in a warm shower. The steam and warm water work together to soften up your hair and the skin around the follicles. Softer hair is way easier to cut, which means a lot less pulling and irritation from your trimmer.
A quick shower also washes away any sweat, oil, and bacteria hanging out on your skin. That's important because if you do get a tiny nick, you don't want that gunk causing a breakout or infection. A shower lasting at least five minutes should be enough to get everything properly softened up.
Key Takeaway: Never, ever trim dry. A warm shower is your best friend—it softens the hair and skin, reduces friction, and makes the whole process smoother and much safer for your skin.
Okay, so after you've let the warm water work its magic, it's time to exfoliate. Grab a gentle body scrub or an exfoliating mitt and lightly massage your chest using circular motions. This simple action gets rid of the top layer of dead skin cells, which are the main cause of clogged pores and, you guessed it, ingrown hairs.
When that dead skin builds up, it can trap a freshly trimmed hair right under the surface as it tries to grow back. That's how you get those sore, red bumps. By clearing away that debris first, you're giving the hair a clean path to grow back properly. For a deeper dive into keeping your skin in top shape, check out this complete skincare routine for men.
Once you're out of the shower, pat your skin completely dry with a clean towel. Electric trimmers work best on dry hair, so make sure there’s no moisture left before you power it on.
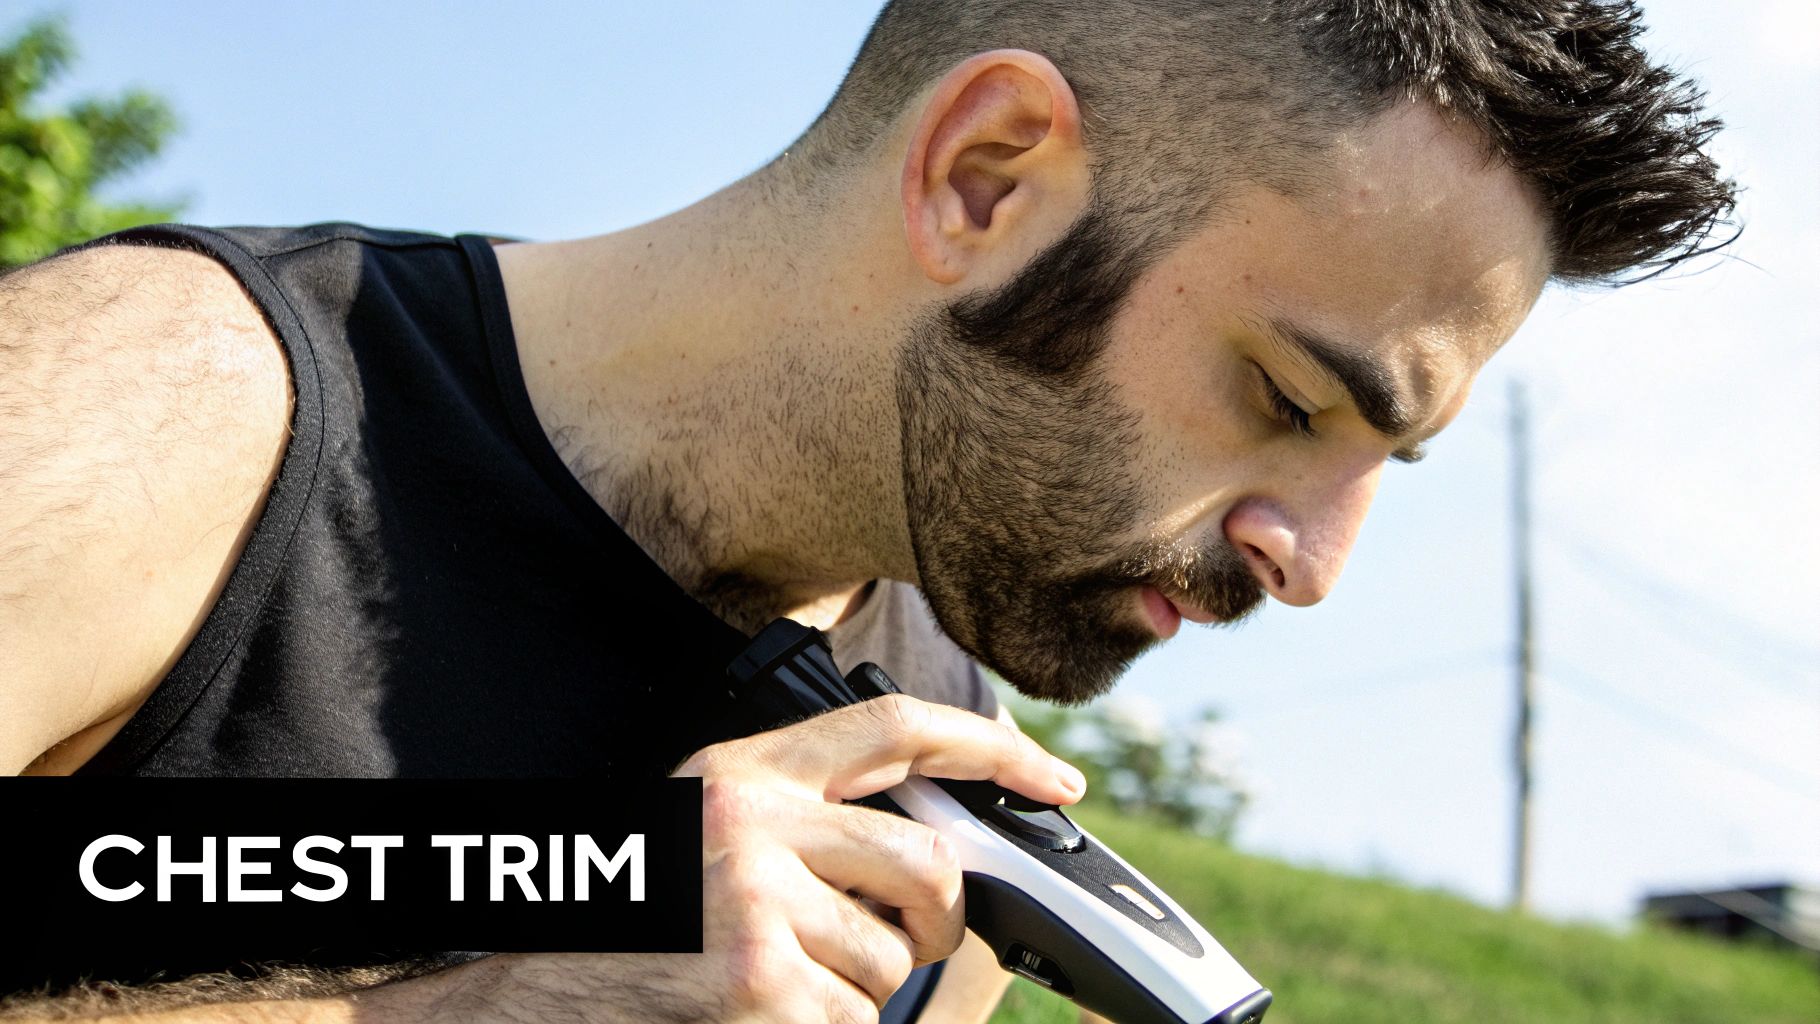
Alright, your skin is prepped and your tools are laid out. This is where the real work begins—taking control of your style. Remember, trimming isn't about complete deforestation; it’s about shaping and refining what you’ve got. The goal is to make your chest hair look intentional, whether that means a subtle cleanup or carving out a more defined, muscular look.
Your first move should always be to trim with the grain, following the natural direction your hair grows. This is so much gentler on your skin and stops the trimmer from yanking at the hairs, which is a one-way ticket to razor burn and irritation. Going with the grain gives you a clean, consistent length without being too aggressive.
Those little plastic guards that click onto your trimmer are your new best friends. Seriously. They're the single most important piece of the puzzle for getting the final look you want. Don’t just grab one and hope for the best. My advice? Start with a higher number than you think you need. You can always take more off, but you can’t glue it back on.
Here’s a quick rundown of what to expect from different guards:
Expert Tip: Before you go all-in, do a quick "test patch" on a less obvious spot, like the side of your torso. This gives you a preview of the length so you can adjust before committing to your entire chest. It's a simple check that has saved me—and many of my clients—from a grooming disaster.
Your chest isn't a flat, easy-to-mow lawn. It has curves, angles, and sensitive spots that demand a bit more finesse. Rushing through these parts is how nicks and patchy spots happen. Slow down and adjust your technique.
The Collarbones and Shoulders: This bony landscape is where nicks love to happen. Use your free hand to pull the skin taut, creating a flatter, smoother surface for the trimmer to glide over. Go easy on the pressure and let the tool do the work.
Around the Nipples: This is, obviously, a no-go zone for careless trimming. Use your fingers to gently flatten the areola and trim carefully around the perimeter. For extra safety, try using just the corner of the trimmer blade instead of the full width—it gives you much more precise control.
The whole idea of men actively grooming their bodies isn't a niche thing anymore. While Europe currently leads the men's grooming market, it's becoming mainstream everywhere. Men's salons and barbershops now frequently offer chest trimming, reflecting a real cultural shift. You see it online, too, where searches for 'how to groom chest hair' have been climbing, especially with younger guys. If you're interested in the data, you can explore more about these market growth trends.
While trimming with the grain is the golden rule for comfort and safety, there are times to break it. If you've done your first pass and you're looking for an even closer finish, you can make a second pass against the direction of hair growth.
Just know that this technique cuts the hair shorter at the cost of increasing the risk of irritation. Only try this if your skin isn't overly sensitive, and always use a light touch. It's a useful finishing move for getting a razor-sharp edge or a closer overall trim.
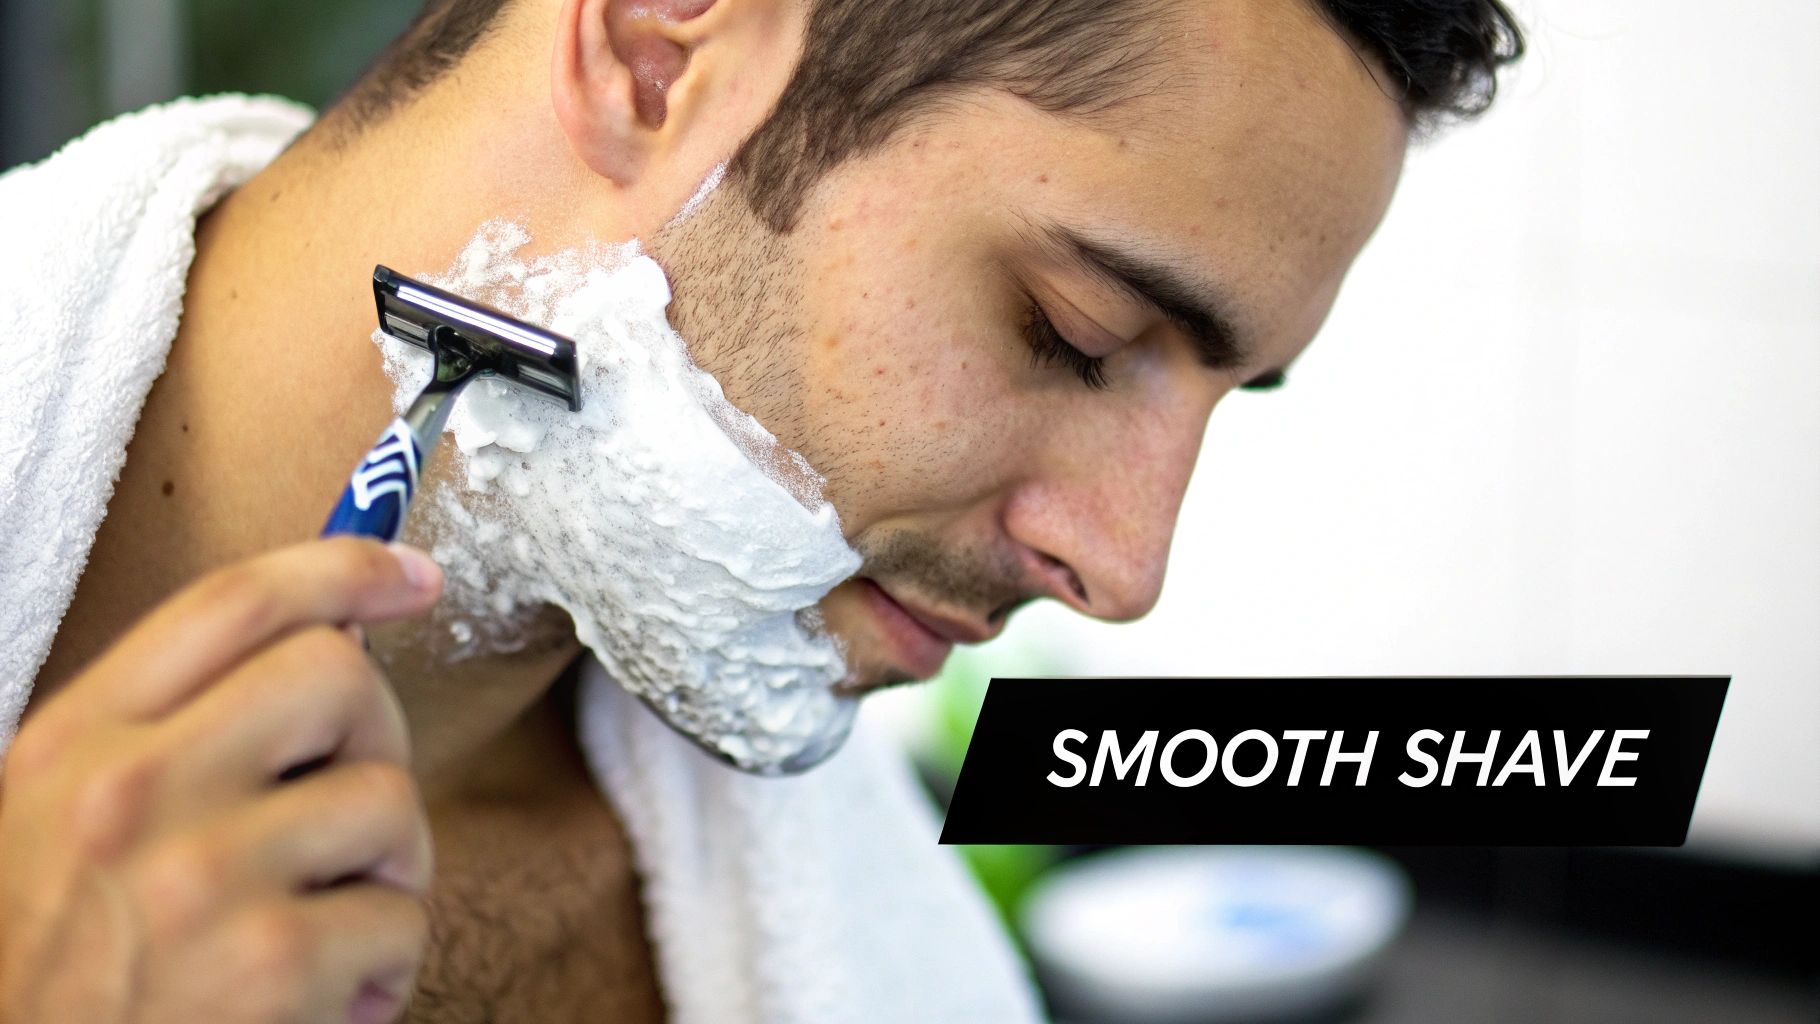
If trimming just isn't getting you the look you want, and you're after that completely smooth, skin-close finish, it's time to reach for a razor. Shaving your chest is definitely more of a commitment than a quick trim, but when you get it right, that sleek, defined result is hard to beat.
Let's be clear: a successful chest shave is all about preparation and a methodical approach, not speed. Trying to rush this is a surefire way to end up with razor burn, nicks, and that angry, red irritation that completely undermines the look. You need to treat this with the same respect you'd give your face.
Before that blade gets anywhere near your skin, you have to lay the groundwork with a protective, lubricated layer. A high-quality shaving gel or cream is absolutely essential here. Forget about using regular soap or body wash; they just don't cut it. Shaving products are designed specifically to create a slick barrier, letting the blade glide smoothly and cutting down on friction.
Slather a generous, even layer over your entire chest. This isn’t just for show. It lifts the hairs up and away from the skin, making them easier for the blade to snip off cleanly. At the same time, it's moisturizing your skin, keeping it supple and much less likely to get irritated.
Alright, once you're all lathered up, it’s go time. The golden rule is to always start by shaving with the grain, which means following the natural direction of your hair growth. This initial pass will get rid of most of the hair with the least amount of resistance and irritation.
Want it even smoother? You can re-lather and go for a second pass, this time against the grain. But, and this is a big but, only attempt this if you know your skin can handle it. For either pass, use your free hand to pull the skin taut. This creates a flat, firm canvas, which helps the razor cut hair as close to the root as possible without snagging on any loose skin.
Crucial Tip: Get in the habit of rinsing your razor blade under warm water after every stroke or two. A blade clogged with hair and cream is a dull, useless tool. Keeping it clean ensures every stroke is as sharp and effective as the first, which is key for a smooth, safe shave.
Shaving around your nipples and over your collarbones is where you really need to slow down and focus. These are the prime spots for nicks and cuts, so a little extra care goes a long way. Use very light, deliberate strokes and take your time.
Here are a few pointers for those tricky spots:
Think of it like driving on a winding road; you wouldn't take a sharp turn at full speed. The same logic applies here. This kind of careful technique isn't just about looks—it’s about skin health. For some context, patients preparing for surgery sometimes get a full body shave where precision is critical to avoid any skin breakage. If you adopt that same level of care at home, you’ll get the best results possible, ensuring your smooth chest is also a healthy one.
https://www.youtube.com/embed/SwgZZe4ICX4
Alright, don't just put the trimmer down and call it a day. What you do in the moments after you finish grooming is what really separates a clean, comfortable result from a chest full of angry red bumps. Think of this part as non-negotiable if you want to keep your skin healthy and your look sharp.
First things first: rinse off with cool water. While that warm shower was great for prepping your skin, cool water does the opposite—it helps calm everything down and encourages your pores to close. It’s a simple trick, but it makes a huge difference in preventing inflammation.
Once you’re out of the shower, gently pat your skin dry with a clean, soft towel. I see so many guys aggressively rub the area, which is a fast track to irritation on freshly groomed skin. Just dab, don't wipe.
With your chest completely dry, it's time to moisturize. Honestly, if you skip this, you’re practically asking for razor burn and flaky skin. Your skin just went through a bit of an ordeal, and it's thirsty.
You absolutely need to grab a lotion or balm that's alcohol-free. Anything with alcohol is going to sting and dry your skin out, undoing all your hard work. Instead, look for ingredients that are known for being skin-friendly:
For top-tier care, I'd recommend an advanced moisturizing after-shave balm specifically made to restore moisture and calm things down. Just apply a light layer across your chest and gently massage it in. Proper aftercare is also your number one weapon against those dreaded ingrown hairs. If you're prone to them, you should really dive into our guide on how to prevent ingrown hairs.
Key Insight: Don't wait for the irritation to show up. It often takes a few hours to develop. Applying a soothing balm right away is your best bet to head it off before it even starts.
Keeping your chest looking good is all about finding a consistent rhythm. How often you need to touch things up really just depends on how fast your hair grows and the look you're going for. The key is to set a schedule that doesn't feel like a massive chore.
Most importantly, listen to your skin. If you’re seeing constant redness or irritation, give it an extra day or two to breathe before you go at it again. A smart routine is what lets you look your best without wrecking your skin in the process.
Even once you get the hang of it, questions are bound to pop up. That’s completely normal. Nailing your chest grooming routine takes a bit of trial and error, but getting solid answers to the most common snags can save you a ton of guesswork and irritation.
Let's dive into some of the questions I hear all the time and get you the straightforward advice you need to perfect your technique.
Honestly, there’s no magic number here. It all comes down to how fast your hair grows and the look you're going for. Your ideal schedule is really about maintaining your preferred style.
The most important thing is to pay attention to your skin. If you’re seeing a lot of redness or irritation, give it an extra day or two to breathe before you go at it again.
Ingrown hairs are the absolute worst, but you can definitely get ahead of them with the right prep and follow-up care. A good defense is always the best offense. Before you even pick up a tool, use a gentle scrub to exfoliate the area. This clears away any dead skin cells that could trap a hair as it grows back.
When you're shaving, make sure you're using a fresh, sharp blade and always shave with the grain on your first pass. After you’re done, follow up with a soothing, alcohol-free moisturizer to calm everything down. If you know you're prone to those nasty red bumps, a product with salicylic acid applied a day or two later can be a lifesaver for keeping pores clear.
Pro Tip: Whatever you do, don't pick at an ingrown hair. You’re just asking for an infection or a scar. Instead, apply a warm compress to help encourage the hair to surface on its own.
This is a big one, and the answer depends entirely on the tool in your hand. Getting this wrong can lead to a patchy job or some serious skin irritation.
Each method has its place, and the "best" one really boils down to what you want the end result to be, your pain tolerance, and how much time you’re willing to put in.
| Method | Best For | Pros | Cons |
|---|---|---|---|
| Trimming | Control and a natural look | Low irritation, fast, customizable length | Doesn't last long, not completely smooth |
| Shaving | A completely smooth finish | Very smooth result, affordable | High risk of razor burn, needs frequent upkeep |
| Waxing | Long-lasting smoothness | Results last 3-6 weeks, hair can grow back finer | Can be painful, risk of irritation and ingrowns |
For most guys, trimming strikes that perfect balance of control, comfort, and aesthetics. While this guide focuses on what you can do at home, some people look for more permanent options. For a longer-term approach, you might explore professional laser hair removal services.
Ready to build a routine that boosts your confidence? The right products make all the difference. Main Character offers premium personal care essentials designed to help you look and feel your best. Start your journey today at dontlooktrash.com.

05.12.2025
How to Stay Focused at Work 7 Actionable Tips
04.12.2025
A Guide to Shaving with Sensitive Skin
03.12.2025
Best Grooming Products for Men A Definitive Guide
02.12.2025
How to Build Confidence for Men: Practical Guide
01.12.2025
Face Lotion With SPF Your Guide to Daily Skin Protection
30.11.2025
Natural Skin Care Products Men Can Trust
29.11.2025
How to Maintain Healthy Skin A No-Nonsense Men's Guide
28.11.2025
what causes dark circles under eyes: tips and fixes