Jan Elvis
26.11.2025

Jan Elvis
26.11.2025
Want a truly great shave? Forget about fancy new razors for a second. The real secret, the thing that separates a smooth, comfortable shave from a red, bumpy mess, all happens before the blade ever touches your skin.
Think of it like this: you wouldn't paint a wall without priming it first. Your pre-shave routine is that primer. It’s the single biggest reason why people get razor burn, nicks, and ingrown hairs. You could have the sharpest, most expensive blade on the market, but if your skin and hair aren't prepped, you're set up for failure. The goal is simple: create a slick, hydrated surface so the razor glides, not drags.
This prep work is all about tackling the three main enemies of a good shave: coarse, stubborn whiskers; dry, flaky skin; and the friction that causes irritation. Get these three things under control, and you’ve already won half the battle.
The easiest—and most important—first step is hydration. I'll say it again for the people in the back: never, ever shave dry.
The best time to shave is right after a hot shower. The steam and warm water are your best friends here. They soften the hair, making it easier to cut, and help open up your pores. This means less tugging, less pulling, and a much closer shave without angering your skin.
No time for a shower? No problem. Just soak a towel in hot water, wring it out, and press it against your face for a good two to three minutes. It does a surprisingly good job of mimicking that post-shower readiness.
Next up, you need a clean canvas. Your skin builds up a layer of oil, dead skin cells, and daily grime. Shaving over that gunk is a recipe for disaster—it clogs your razor, dulls the blade, and can lead to breakouts.
Grab a gentle facial cleanser and wash the area you’re about to shave. This quick step ensures your razor has a clear runway and isn’t just spreading bacteria around your face. It’s a non-negotiable for a clean result.
Key Takeaway: Shaving is a form of exfoliation. By starting with a clean, hydrated surface, you not only protect your skin but also help your razor blades last longer by keeping them from getting clogged.
If you’re plagued by ingrown hairs, this is your secret weapon. Exfoliating once or twice a week (not every day!) with a gentle facial scrub before you shave can make a world of difference.
It works by sloughing off that top layer of dead skin, which can trap hairs and prevent them from growing out properly. By clearing the path, you help each hair stand up straight, allowing the blade to cut it cleanly at the surface. If you want to dive deeper, we have a complete guide on how to exfoliate your face properly.
To better understand how these simple actions transform your shave, here's a quick breakdown.
| Pre-Shave Step | Primary Goal | Why It Works |
|---|---|---|
| Warm Water/Steam | Soften Hair & Open Pores | Hydrated hair is weaker and up to 70% easier to cut, reducing blade drag and tugging. Warmth relaxes the skin for a closer cut. |
| Gentle Cleanse | Remove Debris & Oil | Creates a clean surface, preventing razor clog-up and reducing the risk of post-shave breakouts and irritation. |
| Exfoliation | Lift Trapped Hairs | Sloughs away dead skin cells that can trap hairs, directly preventing the formation of painful and unsightly ingrown hairs. |
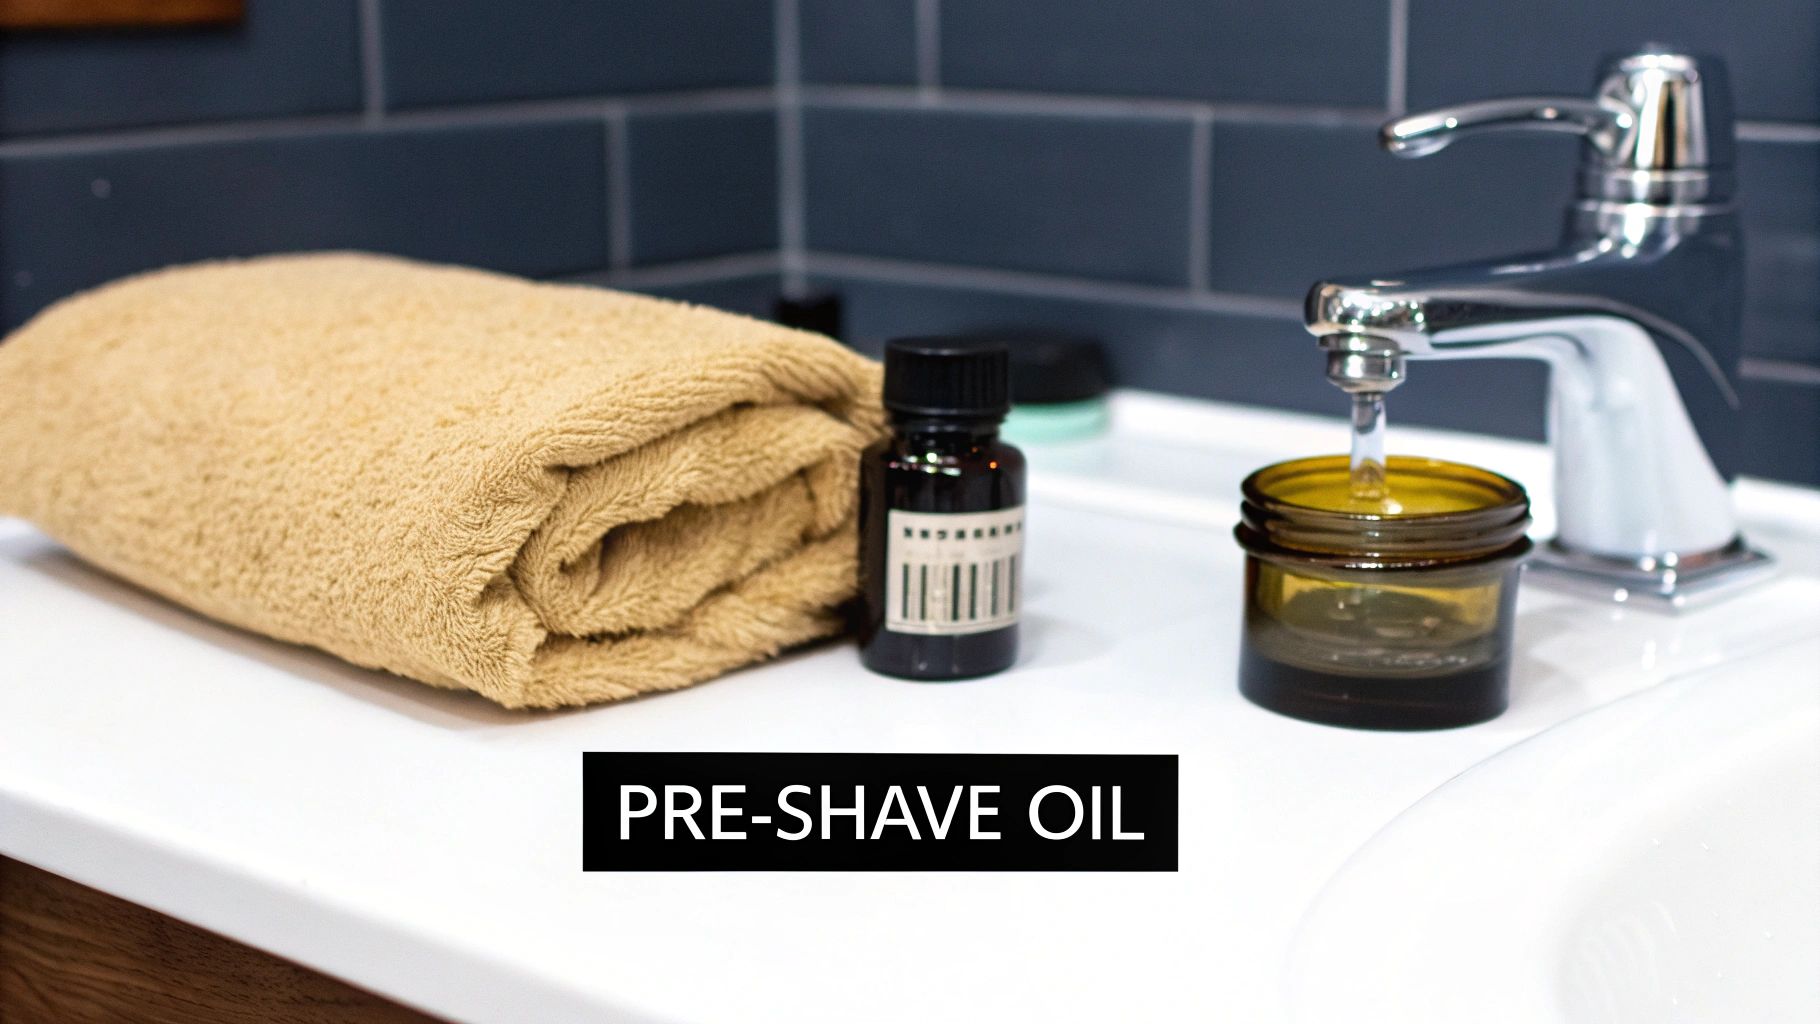
| Pre-Shave Oil | Add Lubrication | Forms a protective, slick barrier on the skin, minimizing friction and allowing the blade to glide effortlessly. |
Each step builds on the last, creating the ideal conditions for your razor to do its job effectively and gently.
For the final touch, especially if you have sensitive skin or a particularly thick beard, consider a pre-shave oil. A few drops massaged into your skin creates a super-slick barrier that provides an extra layer of protection.
This added lubrication is what allows the razor to glide almost effortlessly, dramatically cutting down on friction and the potential for razor burn. It's no surprise that the global grooming market, projected to hit USD 14.8 billion by 2033, is leaning heavily into products like this that prioritize comfort and skin health. It's a small step that delivers a huge payoff in the quality of your shave.
Your shaving technique is crucial, but it's only half the battle. The tools you use—the razor, the blades, the cream—are just as important. Think of it this way: using the wrong gear is like trying to chop a tomato with a butter knife. You might get the job done, but it's going to be messy.
What works wonders for your friend might be a one-way ticket to razor burn for you. The right setup is deeply personal and hinges on your skin type, how coarse your hair is, and frankly, how much time you're willing to spend. Let's break down how to choose your arsenal wisely.
The razor is where the magic happens, and you've got options. Each type offers a different balance of closeness, comfort, and convenience.
To help you decide, here’s a quick rundown of the most common razor types and who they're best for:
| Razor Type | Best For | Pros | Cons |
|---|---|---|---|
| Multi-Blade Cartridge | Convenience seekers, beginners, and those with resilient skin. | Very easy to use, pivoting head follows contours, widely available. | Can cause irritation and ingrown hairs for sensitive skin due to tugging. Replacement cartridges are expensive. |
| Double-Edge (DE) Safety | Sensitive or acne-prone skin, anyone prone to ingrown hairs. | A single, sharp blade cuts cleanly. Very cheap replacement blades. Reduces irritation significantly. | Has a slight learning curve to master the angle. Requires more careful handling. |
| Straight Razor | Shaving purists, thick or coarse beards, those wanting the absolute closest shave. | The closest shave possible. Environmentally friendly (no waste). A satisfying, traditional ritual. | Steepest learning curve, high initial cost, requires regular maintenance (stropping/honing). |
Ultimately, choosing a razor comes down to understanding your own face. If you’re not sure where to start, figuring out how you can tell your skin type is the perfect first step toward building a better shave.
No matter what razor you pick, it's useless with a dull blade. A dull blade doesn't slice hair; it yanks it. This tugging and pulling is the number one culprit behind razor burn and irritation.
So, how often should you swap it out? Forget the old "change it every week" rule. The best indicator is feel. As soon as you notice any pulling, scraping, or discomfort, it's time for a new blade.
Pro Tip: Pushing a dull blade for "one more shave" is a terrible trade-off. You might save a few cents, but you'll pay for it with a day of red, angry skin. Just change it.
Your shaving cream or soap is the protective barrier between a sharp piece of steel and your face. Its main job is lubrication—creating a slick cushion for the blade to glide on, not drag. A good lather also softens the hair and moisturizes your skin.
Here’s what to look for and what to run from:
Look For: Rich, lubricating ingredients like glycerin, shea butter, and natural oils. These create a dense, protective lather that seriously minimizes friction.
Also Look For: Soothing agents like aloe vera, chamomile, and vitamin E. They help calm the skin and prevent redness before it even starts.
Avoid: Harsh, drying alcohols. Check the ingredient list for things like "alcohol denat" or "isopropyl alcohol." Cheaper foams and gels are often loaded with them, and they’ll strip your skin of moisture, leaving it tight and irritated.
Investing in a quality shaving cream doesn’t just feel better—it fundamentally changes the outcome of your shave. You’ll get a closer, more comfortable cut and walk away with healthier-looking skin.
Alright, we've covered the prep work and the tools. Now for the main event—the actual shave. The difference between a smooth, comfortable result and a patchy, irritated mess all comes down to technique. This isn't about brute force; it’s about working with your skin and hair, not fighting against them.
True mastery starts with getting to know your own face. Every guy's beard is unique, with hairs growing in all sorts of directions across the cheeks, neck, and chin. Understanding this growth pattern is probably the single most important piece of the puzzle for a great shave.
Before your next shave, let your stubble grow out for a day or two. Now, run your fingers across your face and neck. When you feel the least resistance, that's "with the grain" (WTG). The direction that feels rough and prickly is "against the grain" (ATG).
Take a moment to create a mental map. You’ll probably notice your cheek hair grows downwards, but the hair on your neck might shoot off sideways or even grow up towards your chin. This map is your new blueprint for a perfect shave.
The first pass with your razor should always be with the grain. Think of this pass as simple bulk removal—it takes down the length with the least amount of friction and irritation. It's the safest and most effective way to start.
For a lot of guys, a single pass with the grain is plenty for a clean, everyday shave. But if you’re chasing that "baby-smooth" feeling, you'll need to do a bit more. This is where multiple passes come in, but there’s a right way and a wrong way to do it.
Shaving has an incredibly long history, dating back over 5,000 years to when our ancestors used sharpened shells and flint. Today, the average man performs around 150 strokes per shave. It’s a myth that this makes hair grow back thicker; in reality, it just provides some mild exfoliation. The fact that traditional wet shaving is still preferred by about 70% of men over electric options really speaks to the timeless appeal of a proper technique. You can find more fascinating facts in this guide to the history and science of shaving.
This breakdown shows how the core components of your shaving kit work together.

The flow from razor to lather to blade highlights how each piece of the puzzle supports the others for a successful shave.
One of the most common rookie mistakes is pressing too hard. You might think mashing the razor into your face gets you a closer shave, but all it really does is cause razor burn, nicks, and angry red bumps.
A sharp blade needs almost no pressure to do its job. Your role is simply to guide it. Hold the razor lightly—let its own weight provide the pressure. Use short, deliberate strokes and be sure to rinse the blade under hot water every stroke or two. A clogged razor is an ineffective razor.
Let's be honest, some spots are just a pain to shave. Here’s how to tackle them without looking like you lost a fight with a lawnmower.
Getting these techniques down transforms shaving from a chore into a skill. It takes some practice, but focusing on your grain direction, using a light touch, and knowing how to handle those difficult spots are the keys to that consistently smooth shave you're after.
Think the job is done once the razor is down? Not even close. What you do in the few minutes right after a shave is what separates a decent result from a truly great one. This is where you lock in that smoothness and head off redness before it even starts.
Frankly, this is the step most guys either rush or skip entirely, and it's a huge mistake. After a shave, your skin has been exfoliated and is wide open, ready to soak up whatever you put on it. The mission now is to calm, hydrate, and protect it.
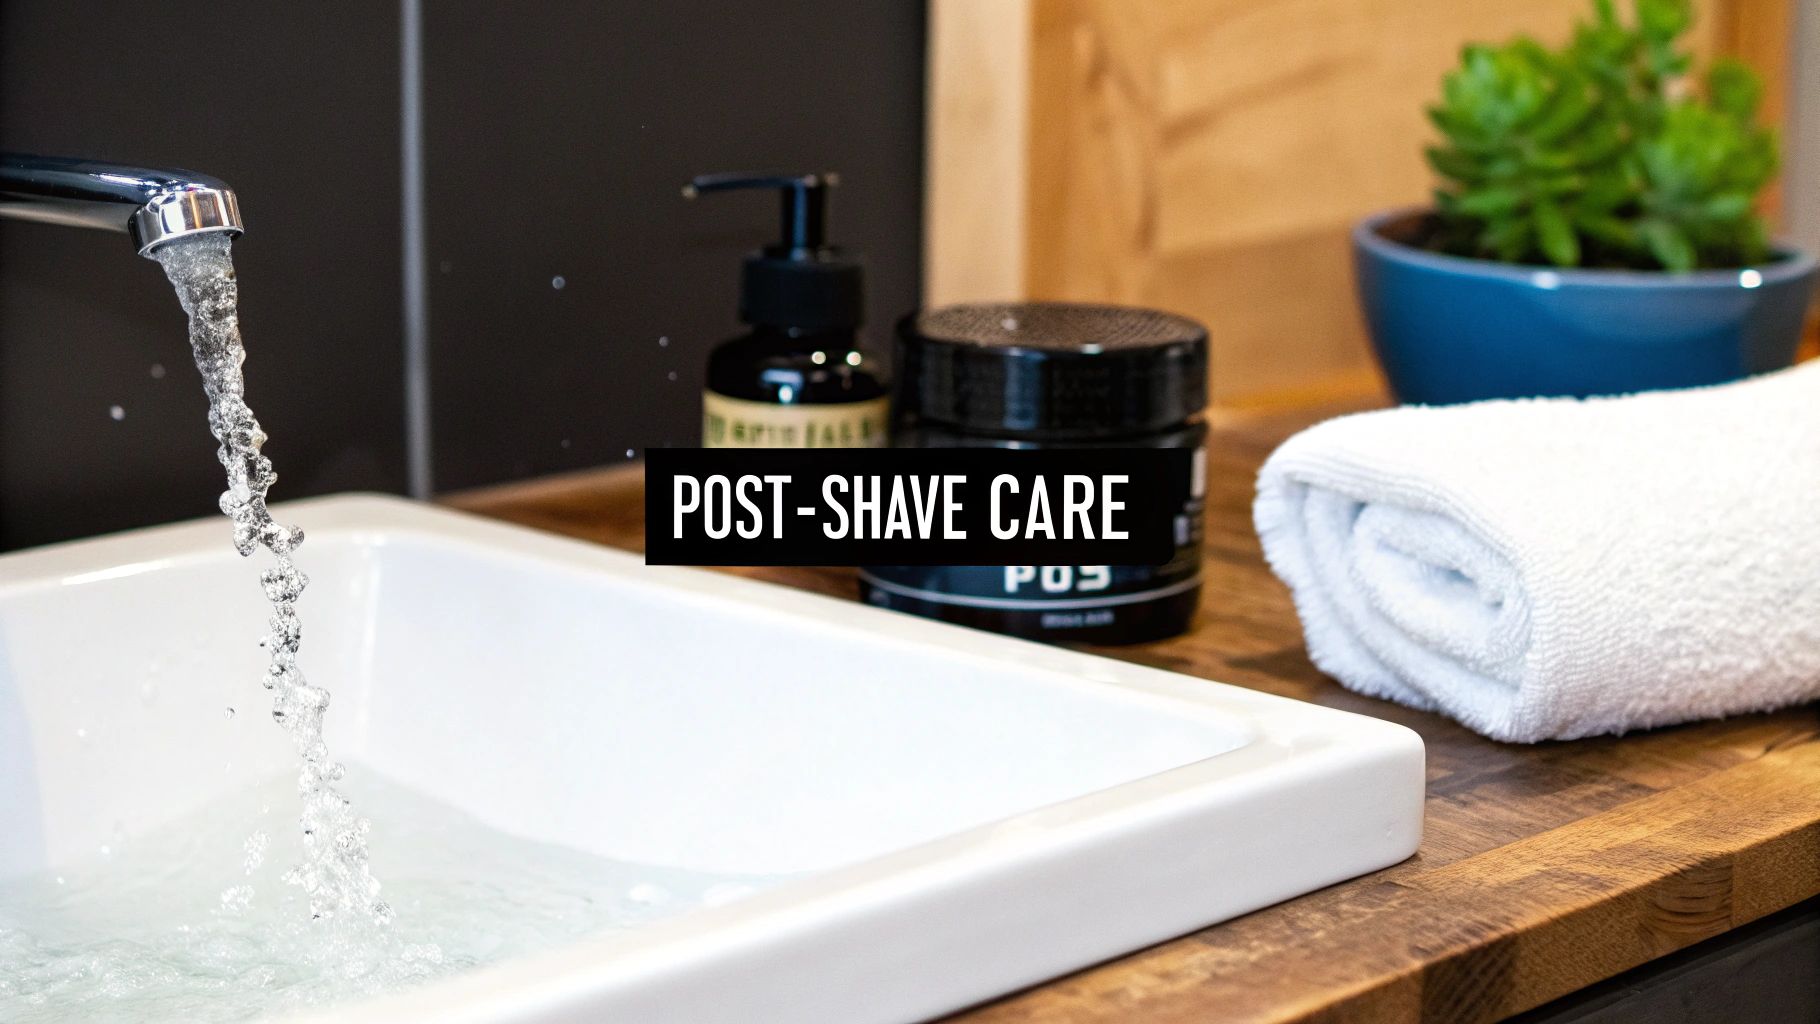
After you've rinsed off all the remaining lather with warm water, finish with a final splash of cool or cold water. Don't underestimate this simple move—it works wonders.
The cold helps constrict the blood vessels near the surface, which immediately tones down any redness. It also encourages your pores to tighten up, creating a barrier against the grime and bacteria that can cause breakouts later. It’s a refreshing jolt that tells your skin the shave is officially over.
The word "aftershave" probably makes you think of that stinging, alcohol-loaded stuff your dad used to slap on. We've come a long way since then. Modern products are designed to heal, not hurt, and the right one depends entirely on your skin.
Choosing a product that prioritizes hydration over pure disinfection is a game-changer. A good balm or gel gets ahead of razor burn by calming the skin and replenishing moisture before irritation has a chance to set in.
Flip that bottle over and read the label. The ingredient list is where you'll find out if a product is worth your money. You're looking for natural, calming agents.
Your post-shave routine isn't just for your face; it's for your gear, too.
Always give your razor a thorough rinse under hot water to blast away any lingering hair, skin cells, and cream. Give it a good shake to get rid of excess water, and then store it somewhere dry—preferably upright in a stand, out of the shower.
Leaving a wet razor in a damp environment is just asking for rust and bacteria to build up. That not only dulls your blade faster but can also lead to nasty skin infections. A clean, sharp blade is your best defense against irritation for your next shave.
Let's be realistic: even with a perfect routine, a flawless shave isn't always in the cards. Sooner or later, you'll deal with some irritation, a stubborn ingrown hair, or a small nick. It happens to everyone.
The goal isn't to avoid problems forever—it's to know exactly how to fix them when they pop up. Most shaving issues boil down to three things: too much pressure, a dull blade, or lazy prep work. Nailing these fundamentals is your best defense, but for those times when things go south, here’s your game plan.
You know the feeling—that red, stinging irritation that shows up a few hours after a shave. That’s razor burn, and it’s basically your skin protesting the friction from a blade. It's often a sign you're either pressing too hard or using a blade that’s seen better days.
When it strikes, cool things down immediately. Grab a washcloth, soak it in cold water, and apply it to the area for a few minutes. This simple cold compress helps reduce inflammation and provides instant relief from that burning sensation.
Once the area is cool, follow up with a soothing, fragrance-free moisturizer or a quality aftershave balm. I always look for calming ingredients like aloe vera or chamomile to rehydrate the skin and kickstart the healing process.
Ingrown hairs are those annoying, sometimes painful bumps that appear when a hair curls back on itself and grows into the skin. If you have coarse or curly hair, you’re probably all too familiar with them.
Your best weapon here is prevention. Regular, gentle exfoliation is a must, as it clears away the dead skin cells that can trap hairs under the surface. I find that a chemical exfoliant with salicylic acid or glycolic acid, used a few times a week, works wonders.
If you’ve already got an ingrown hair, fight the urge to pick at it. That’s a one-way ticket to scarring and infection. Instead, apply a warm compress to soften the skin and help the hair surface on its own. If you can see the loop, you can use a pair of sterile tweezers to gently lift the end out from under the skin—just don't pluck it out completely.
For a deeper dive into managing these persistent issues, our guide on how to treat razor bumps offers more targeted strategies and product recommendations.
A small cut is almost a rite of passage for every shaver, but how you handle it makes all the difference. You want to stop the bleeding quickly and cleanly, so it doesn’t ruin your smooth finish.
The old-school tools are still the best for this. A styptic pencil or an alum block is essential for any shaving kit. They're packed with natural astringents that constrict the tissue and stop minor bleeding in seconds. Just wet the tip and press it firmly against the cut. It'll sting for a moment, but it works like magic.
After the bleeding stops, give the spot a quick rinse with cold water and pat it dry. Of course, the best approach is to avoid nicks in the first place.
Having these quick fixes in your back pocket means you can handle any minor setback with confidence and keep your skin looking and feeling great.
Even when you've got the basics down, a few nagging questions can stand between you and a truly great shave. This is where we get into the nitty-gritty, tackling those common "what ifs" and "should I's" that can make all the difference. Think of it as fine-tuning your technique for consistently smooth results.
So, how often should you actually be shaving? This is probably the most common question I hear, and there’s no one-size-fits-all answer. It really comes down to how fast your hair grows, how sensitive your skin is, and what you prefer. Some guys can shave every single day without a problem, while others find that every other day is the sweet spot.
That extra day gives their skin a much-needed break to recover, which dramatically cuts down on irritation. The best advice? Listen to your skin. If you’re seeing constant redness or bumps, try adding a rest day. It’s a simple change, but letting your skin’s natural barrier heal can make your next shave feel a whole lot better.
Ah, the classic debate. The answer isn't just about the price tag, but what's inside the container. While a higher price doesn't automatically mean it's a better product, you're usually paying for a much better formula. Those cheap aerosol foams are often loaded with drying alcohols and propellants that do a terrible job of lubricating your face and end up stripping away moisture.
A quality shaving cream or soap, on the other hand, is built differently. They're usually packed with ingredients that actually help your skin.
You don't have to spend a fortune, but investing in a product that puts good ingredients ahead of cheap fillers will completely change your shave. You'll feel the difference immediately in how the blade glides and how your skin feels afterward.
Your shaving cream is the only thing protecting your skin from a sharp piece of steel. Skimping on it is like putting cheap oil in a performance car—it might run, but you're asking for trouble and won't get the performance you want.
Shaving with active acne requires a delicate touch and a lot of patience. Your main goal is to cut the hair without making your breakouts worse or spreading bacteria around your face. Shaving aggressively over acne is a recipe for scarring and more inflammation.
Rule number one: never try to shave directly over an inflamed, angry pimple. Just don't. Carefully shave around it. For areas with smaller bumps, your technique is everything. Start with a fresh, sharp blade. A single-blade safety razor is often the best choice here because it causes less drag and irritation than multi-blade cartridges.
Use as little pressure as possible and only shave with the grain. Forget about going against the grain for a closer shave—it’s not worth the irritation. Afterward, reach for a gentle aftershave balm that is non-comedogenic (meaning it won't clog your pores) and alcohol-free to soothe your skin without causing more problems.
At Main Character, we believe a solid grooming routine is a foundation for confidence. Our products are designed to give you everything you need for a smooth, comfortable shave, every single time. Explore our collection and build a routine that helps you look and feel your best.

05.12.2025
How to Stay Focused at Work 7 Actionable Tips
04.12.2025
A Guide to Shaving with Sensitive Skin
03.12.2025
Best Grooming Products for Men A Definitive Guide
02.12.2025
How to Build Confidence for Men: Practical Guide
01.12.2025
Face Lotion With SPF Your Guide to Daily Skin Protection
30.11.2025
Natural Skin Care Products Men Can Trust
29.11.2025
How to Maintain Healthy Skin A No-Nonsense Men's Guide
28.11.2025
what causes dark circles under eyes: tips and fixes